Showing posts with label dashlet. Show all posts

Friday, January 13, 2012

Create custom dashlet in alfresco share.


Creating Custom Dashlet

creating custom dashlet is easy in alfresco share. Most common required file(s) are as below:
  1. descriptor file (.desc.xml)
  2. main html template file (.html.ftl)
  3. js file (having logic for calling local or remote script) [optional]
  4. properties file [optional]
  5. head file [optional]
    Let we will create sample dashlet which will display current user name who logged in.

For the starting point lets create these files in Out-of-box path :
alfresco\tomcat\webapps\share\WEB-INF\classes\alfresco\site-webscripts\org\alfresco\components\dashlets

  • loggeduser.get.desc.xml

This file is descriptor file and define a webscript url through which it will be called and display appropriate template.


<webscript>
<shortname>Username Display Dashlet</shortname>
<description>Demo dashlet for username display</description>
<family>site-dashlet</family>
<url>/components/dashlets/loggeduser</url>
</webscript>

  • loggeduser.get.html.ftl
This file is html template or display area of the script. Content would be displayed here.
<div class="dashlet">
<div class="title">Demo</div>
 <h3> Logged user : ${user.name}</h3>
</div>


Now check with your site dashboard area and click “customize dashboard” button and select dashlet Username Display Dashlet.

Click “OK”

done...!!!

Tuesday, November 29, 2011

Create custom dashlet in alfresco share

To create a custom dashlet, its easy in alfresco share.All we need is following files for creating our hello world dashlet.

Go to our extension area \tomcat\shared\classes\alfresco\web-extension\site-webscripts\org\alfresco\components\dashlets & create following files.

1. hello-world.get.config.xml
<hello-world>  
   <greeting>hello</greeting>  
 </hello-world>
  2. hello-world.get.desc.xml
 <webscript>  
   <shortname>Hello World</shortname>  
   <description>Displays Hello World text to the user</description>  
   <family>dashlet</family>  
   <url>/components/dashlets/hello-world</url>  
 </webscript>  
 This is our descriptor file, which defines webscript called hello-world.

 3.hello-world.get.html.ftl
 <div class="dashlet">  
   <div class="title">${msg("header")}</div>  
   <div class="body scrollableList">  
    <div class="detail-list-item first-item last-item">  
     <span><#if greeting=="hello">${msg("label.hello", user.firstName)}<#else>${msg("label.goodbye", user.firstName)}</#if></span>  
    </div>  
   </div>  
 </div> 
 This is our html template file which is actually going to be displayed in our dashlet by greeting username.

 4.hello-world.get.js
function main()  
 {  
   var s = new XML(config.script);  
   var greeting = s.greeting;  
   // Set the model object  
   if (greeting == "hello")  
   {  
    model.greeting = "hello";  
   }  
   else  
   {  
    model.greeting = "goodbye";  
   }  
 }  
 main();  
 This javascript will proceed with first file and and get the greeting message, if we have hello it will display hello else goodbye.

 5. hello-world.get.properties
header=Hello World!  
 label.hello=Hello {0}  
 label.goodbye=Goodbye {0}  
This is our properties file taking values accordingly.

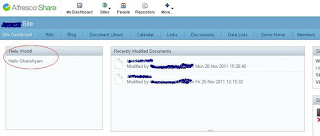
Once you complete all above steps, restart alfresco server. Go to specific site -> Click on Customize dashboard button. you will find like below:

Add it and Click OK.